Tuesday, 6 December 2011

Advanced 3D modelling evaluation


For this unit I had to create a working low poly model showing advanced modelling techniques, and sculpting using a sculpting package (Mudbox). I decided to separate my modelling and animation unit, even though the choice to combine them was open to me. By doing this I felt I could focus on each unit independently and better hit the specifications of the brief for each unit.

For this unit I decided to model an Enzo Ferrari, as I had never tried to model A vehicle before and thought it would be an interesting way to test my skills, and ability to handle new challenges. I decided to specifically do and Enzo Ferrari for 2 reasons. Firstly due to it being my favourite car to have been put into production and owning a scale model of it (which helped with the modelling immeasurable) and secondly, because it is a very complicated car to model and I wanted to test my modelling abilities.

I used box modelling on the majority of the modelling process, avoiding splines because they can sometimes cause problems with smoothing.  I began by building the individual parts of the Enzo’s bodywork then attaching them together, ending up with a low poly model resembling the contours of the original model but still very basic. I then moved onto cutting into the model, insetting and extruding polys and removing other poly’s to start building up the finer details of the model.

For some of the intricate details of the model such as the vents and tire treads, I used Mudbox to sculpt the details onto the flat models I produced in 3DMax. I did this using the stencil tool and images of tire treads and vents I found online as stamps.

If I were to try modelling this again, I probably wouldn’t change anything. I didn’t encounter any major problems while modelling this object. There were a couple of times where I hadn’t welded geometry together correctly and it caused horrible creases in the model after smooth had been applied, but these were easily rectified, after I had found the broken geometry.

While working on this model I have learnt a lot of new techniques and tools in max. One of the ones I really like are the mental ray default material settings, that can be (an were) used to give objects realistic effects, with computed reflections and refractions. They increase the render times significantly, but the end result is worth it. I learnt that the soft selection tool can be used in a variety in situations to give good results (I was used to just using them for facial animation). The bend tool is, as a whole, useless. It bends cylinders nicely but anything with more complex geometry ends up horrible distorted and look horrible.

I am extremely pleased with how my model turned out after all the work I put into it. The model looks just like the physical one I worked from, and the metal ray maps I’ve applied to it really help to bring it to life.

Monday, 5 December 2011

Enzo modelling pt11...or is it 12. Modelling completion


Toda I modelled the dashboard and seats for the car, using box modelling as I have done before, with mudbox and mentalray maps to add detail, to give me these final results.
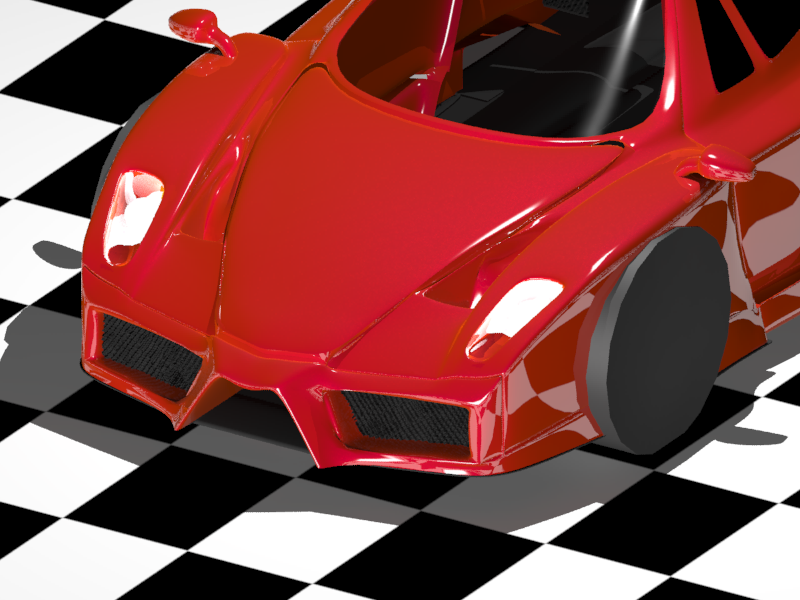
So here we are, 1 month, 3 backups, 6 indipendent save files, 36 materials, 79 objects and 2.8 million polys (and a similar number of disgruntled cusses) down the line, and the model is finally complete. See now the fist render I took aof the front of the car as I began modelling.
I've made a little bit of progress since that point!

Enzo modelling pt 11, Engine

I modelled the Enzo engine Using mostly standard primatives. I used a little bit of box modelling on the main block and the base but other than those most of it was modelled with simplicity.


Then I mapped it and placed it within the car chassis, Giving me this result.
Next step will be the dashboard. ACTION SHOT!!
VVVVVVVRRRROOOOM!

Enzo modelling pt 10, Final bodily details

 I made the badge using a simple bos, then used mudbox to paint on the ferrari logo
And used simple tubes as the exhausts and UV mapped the licence plate to one I found online. All thats left to do now is the interior.

Enzo modelling pt 9, WE'ALS!

I started off by modelling my wheel from a cylinder that I subdivided, then medellied for about 2 hours to get the shape of the Rim I wanted, Then I moved onto the tires.
This is a tire texture that I found online that I then used to stencil onto a tire (made from a tube) in Mudbox, to create the treads, giving me theis final wheel
I then placed the wheel into the chassis and cut out the wheel archs. I will now model the exhaust and ferrari badges.

Sunday, 4 December 2011

Enzo modelling pt8. chassis


Using box modelling, and more of the same techniques Ive used over the course of producing this model, I have models the chassis section of the enzo ferrari. Tomorrow I will start work on the wheels, replacing the incredibly bland cylinder that they are at the moment.

Enzo modelling pt7. Mudboxing vents.

Today I decided to begin work on the vents of the ferrari, starting with the front. I started with a standard plane shapped to the vent hole, then imported it into mudbox, and bumps the sudivitions upto 8 (it was only a 2 poly mest to start with). I then got a picture of a vent off the internet to use as a stencil, which turned out quite nicely, so I exported my displacment and normal maps.

I then imported the maps into max and used the displacement modifyer on the original plane,with a turbosmooth to give me the final result.
I then repeated this process on the side and rear vents.